Painting and decorating your walls

Choosing the Perfect Shade

Before you start painting, it is crucial that you carefully consider your options when it comes to selecting the right colour scheme for your rooms. Choosing a colour that brightens your room and makes you feel good is vital, but it is also essential that you consider the tones and styles of your furniture and flooring too. You might want to paint your walls light blue, for example, but if your sofa is cream, the colours might clash. Blue tends to have cool undertones, while cream is generally a warm-toned colour. There are certain exceptions to the rule. A combination of grey and yellow, for example, can give your room a fresh contemporary look

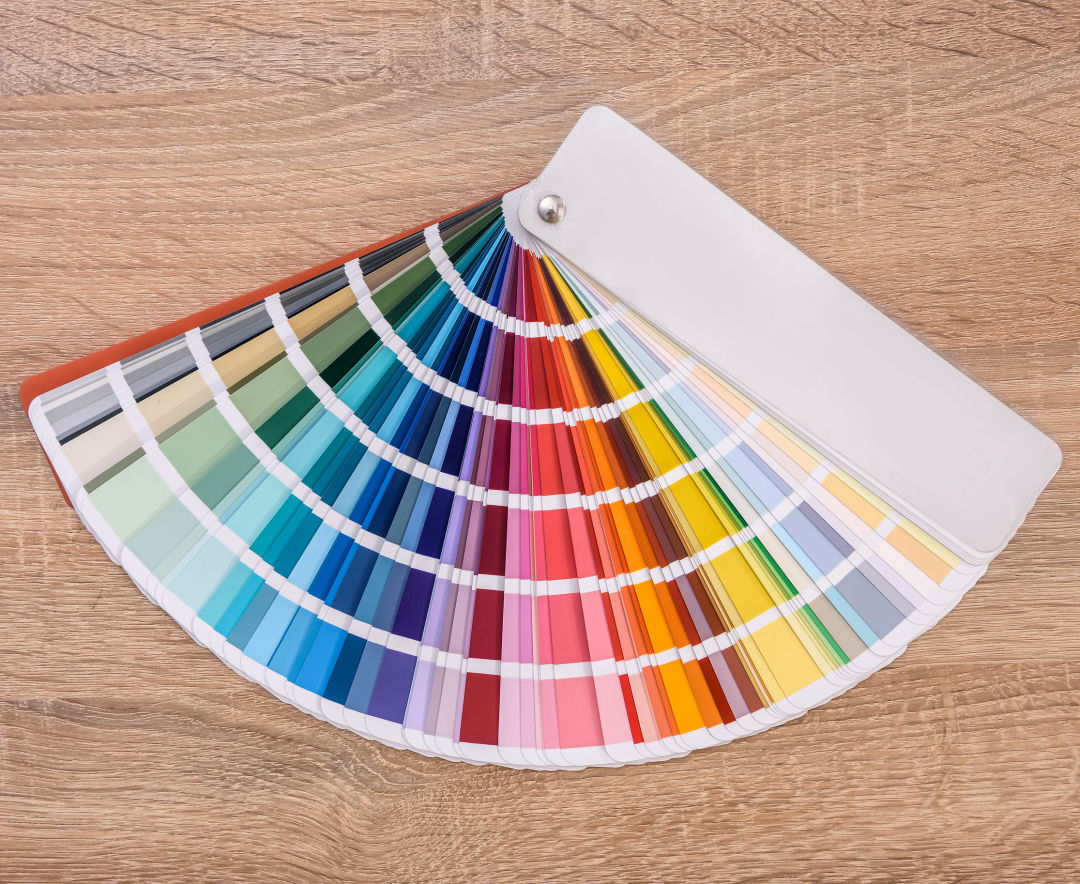
Get a Pantone colour palette (pictured) from your local DIY or hardware store and place your chosen strip next to or on top of your sofa, carpet, etc. to see if the colours look good together. When you have chosen your perfect shade, take it back to your store, and they will mix the paint for you.
pantone colour palette for choosing the right paint

Surface Preparation

If your walls and ceiling are in perfect condition, you might be able to start painting right away. If not, minor filling and sanding may be required. 

Make sure you have all the tools before you start. You will need emulsion paint in your chosen shades, wood paint for the skirting, two paint rollers, brushes and trays, a telescopic handle, a stepladder, masking tape and something to cover the floor. If there are cracks or holes in the walls, you will need a filler, a filling knife and a sanding block. 

Start by covering the floor and furniture with a dust sheet, plastic sheet, or some cardboard. If your walls and ceilings need smoothing, apply filler to holes and cracks and press it in place with a filling knife. When the filler dries, rub the entire walls and ceiling with a sanding block, before cleaning the walls gently with a wet cloth to get rid of the dust.

Apply masking tape to the top of the skirting (the narrow piece of wood attached to the lowest part of the wall) and to the edges of light switches and plug sockets before your start painting.

Preparing your paint
Most of the times, you will need two or three coat of paint for your walls and ceiling, one mist coat and one or two coats of emulsion. For the mist coat, dilute your emulsion by adding some water (approximately two parts of emulsion, one part water). 
Tools for painting walls and ceilings

Painting the Ceiling


Attach a telescopic pole to the handle of the roller. Carefully tip some of your mist coat into the tray reservoir and and gently glide your roller over the paint surface. Do not submerge the roller in the paint. Gently move the roller backwards and forwards over the ribbed section of the tray to distribute the paint evenly over the roller's surface.

Wear protective goggles to prevent spatters of paint from getting into your eyes. 

Roll the paint onto the ceiling in sections, laying off each area before dipping the roller in the paint again. When the central area of the ceiling is coated, use a brush to paint around the edges. You might need a step ladder or a steady chair to do this. 
Painting a ceiling with a paint roller

Painting the Walls

If you are using a different colour for the walls, get a clean brush and roller, prepare the mist paint using the same method as for the ceiling. Dip the brush and paint the junctions between the walls and ceilings, corners and areas around radiators, switches and sockets. 

Now, dip your roller in the mist paint and roll paint onto the wall in vertical sections. Use an extension pole so that you can easily reach the higher areas. 

Repeat the whole process, including painting the ceiling, using the undiluted emulsion paint. For best results, you might need two coats of emulsion.
Painting a wall grey using a paint roller

Painting the Skirting

Skirting is usually made from natural wood or MDF (man-made wood). Bare wood skirting will need to be treated with a knotting solution (spirit based sealer) first, before being painted with primer. You can apply primer to bare MDF without using the solution. If your skirting is painted, you will first need to clean the surface using a wet cloth with a mild detergent and dry it with a paper towel before moving directly onto the decorative paint. Before you start painting, apply a strip of masking tape along the floor. 

Use wood paint in a similar shade as your wall paint, preferably slightly darker. You can choose between gloss, satin and eggshell finish. Start painting across the top of the skirting, using a 5 cm wide brush, applying the paint evenly along the length of the board and working in sections about one metre long. Remove the masking tape before the paint dries to stop it from peeling away. You might have to wait for up to 24 hours for the first coat to dry before applying the second (final) coat. 

If you would rather hire a professional painter to paint your skirting and maybe doors and door frames as well, our painters and decorators have years of experience painting and improving London interiors.
Painting a skirting board with a brush

V-Fix Maintenance


Contact Us
office@vfixmaintenance.co.uk
Phone: 020 3302 1783
 
183 Edgware Road
London
NW9 6LP

Where We Work


We operate across Central London, North London and North West London, including Victoria, Westminster, Kensington, Shepherd's Bush, St. John's Wood, Maida Vale, Swiss Cottage, Camden Town, Hampstead, Golders Green, Kensal Green, Willesden, Wembley, The Hyde, Mill Hill, Hendon, Brent Cross, Finchley, Edgware, Harrow, Barnet and Hadley.

Contact Us